When the first 3D printed hands were being made 2 years ago, one of the original designers had the hope that instead of having thousands of people relying on just two men to help make hands for people in need – that we would somehow be able to find a way to teach others how to make these devices and in doing so, we would be able to watch them teach even more people and …witness the idea grow into a global collaborative effort to make hands for people in need.
It appears that is exactly what is happening…and it is absolutely beautiful.
Not only are adults teaching adults how to make these hands, but children and young adults are now making these for other children and for every person that learns how to make a hand – they can then teach another… and the need to rely on just a handful of individuals to create these devices – is shrinking by the day. We now have entire groups of children learning how to make these and becoming inspired to share their knowledge and continue “Making.”
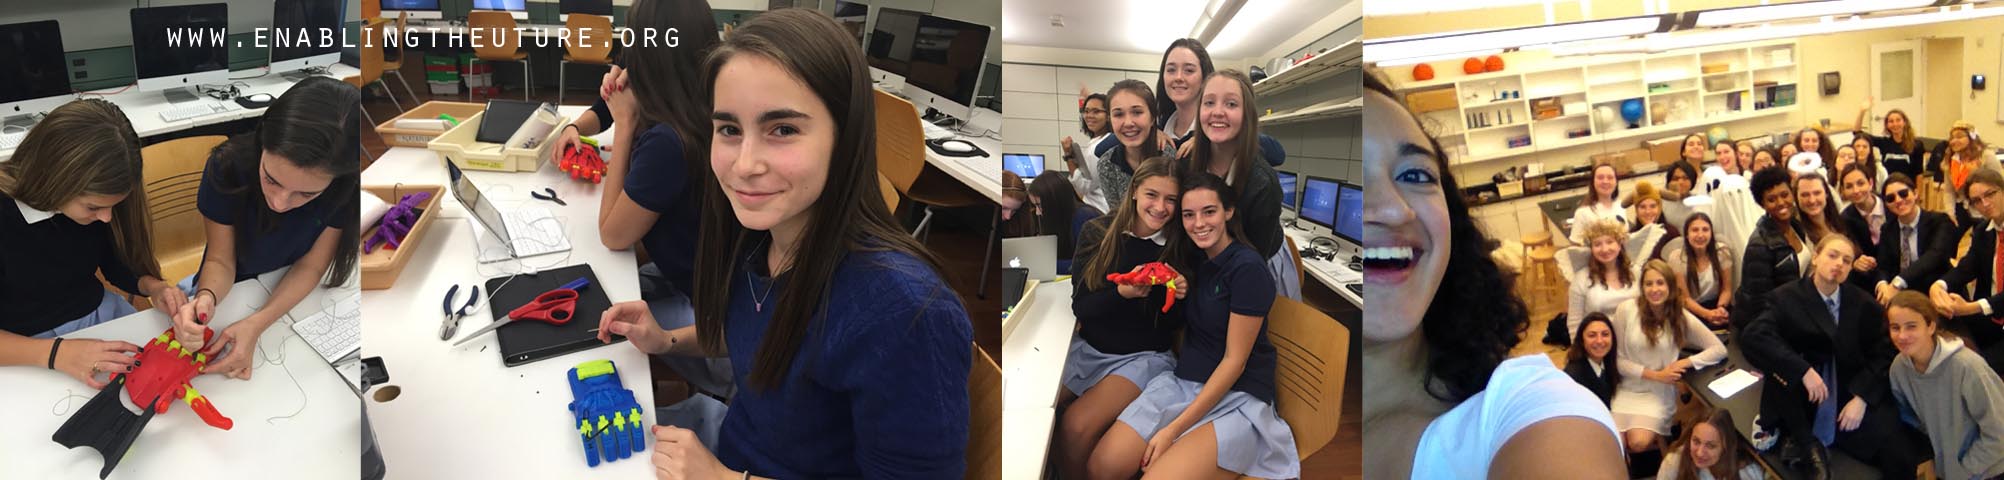
For the past few months, we have learned of many schools who have been bringing e-NABLE into their classrooms of math and science students as well as after school robotics and engineering programs, but until this point, we have not had a chance to really glimpse into the process they are going through and usually just get to see the final product and resulting smile on a child’s face.
Thanks to the wonderful teachers at Convent of the Sacred Heart School in New York and their amazing students – we are getting to watch the process and visit the classroom as they learn to size, measure, design and problem solve – using e-NABLE hands as their project. These students are making hands for THREE children.
We asked teacher Tanya Lerch to tell us a little about what they are doing at CSHNYC:
Can you tell us a bit about your project?
I teach two geometry classes and one Algebra ll class. Each of my geometry classes is pairing up with an engineering class to collaborate on a hand. The Algebra II class will work independently (most of them had me last year and did another project on the 3D printer so are more familiar with it and the Tinkercad software).
We have three recipients: two six-year-olds and one 16-year-old. The six-year-olds both have use of their thumbs, which will be factored into the design modification of the Raptor hand; the geometry/engineering classes will work on those. The 16-year-old is missing both hands. Three teachers and I are creating one of his hands, and my Algebra II class will create the other.
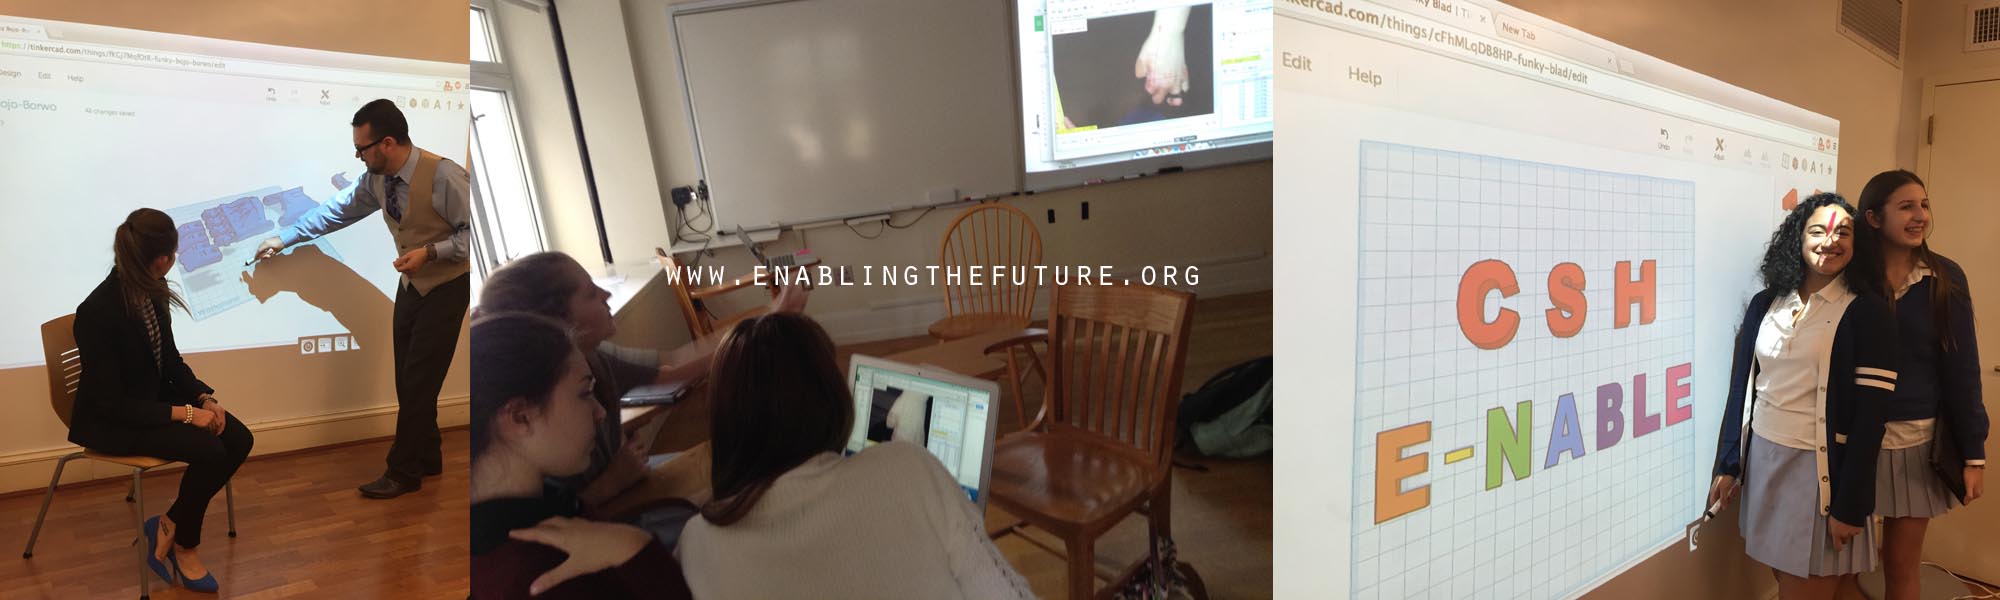
Next week, we will meet for four days (periods are 40 minutes long). In groups of two, students will first each work on doing the calibration and the measurements of the hands (this teaches them about scale factor, measurement skills, and the virtual measurement software- tracker). They will also generate the .STL files. They will then work on problem-solving, such as how to remove the thumb from the Raptor hand design for the six-year-olds.
We are also having students do some fun customizations, such as adding a Lego piece to the print build for one child who loves Legos, creating a snap-on stylus finger tip for the 16-year-old to use with his iPad, and using different color combinations to make the hands fun and in the favorite colors of the recipients. The files will get sent to the printer and the students will be able to check the progress periodically. Once all pieces are printed, the pieces will be set up in ‘stations’ in the engineering room. The students will have to go in independently, with their partners, and will each be responsible for one set of the assembly steps. Before they start, they will have to demonstrate their knowledge by passing a quiz that asks them to identify all parts and tools. They will be required to document their progress and successful completion of each step with photos. Once each hand is complete, we will reconvene to test and trouble-shoot, and then pack up and ship the hand to the recipient. We are very excited that one recipient will be coming in to pick it up in person (December 5).
All steps and resources are documented on the website:
https://sites.google.com/a/cshnyc.org/enable/home
We are hoping other classes at our school will be able to replicate this project in the spring.
How did you find e-NABLE?
Jerry Castanos at 3D Heights mentioned it.
What made you decide to do this with your students?
Part of our school’s mission is to inspire in our students a social awareness that impels to action. We have a thriving community outreach program, and we really value service-learning opportunities. Constructing the hands seemed like a great way for the students to use some of the technology we are so lucky to have, in a way that helps others. The project will also help them learn about incredibly useful real-world applications for 3D printing, engineering and math!
Did you come up with your own curriculum for this project?
Yes, with input from other teachers
How did you find your recipients? (Did you go through Matcher?)
Yes, we went through Matcher.
What do you hope your students will gain from this? What about you?!
We are hoping that they will be extra-motivated regarding this project because they know that their hard work will help someone in need. We also hope they learn skills that are useful in the real world outside the classroom (measurement, scaling, problem solving, fine motor skills, documentation), and that they have fun! We also think they will benefit from interacting with kids of different ages in different locations with disabilities. We hope this is something memorable for them.
Anything you would like to say to other educators about e-NABLE and what you feel it could bring to the classroom (to those schools with 3d printers AND without (if maybe we started sending 3d printed parts to classrooms so they can assemble them together?)
The overall cost is SO minimal –15$ per hand for the extra parts, and probably $5 for the filament used – yet we are making such a difference. Yes, the 3D printer is “cool” and makes fun things, but the real benefit is using it to help others in very real ways. The sacrificed class time is minimal in comparison to what the students will gain. Sending parts to classrooms to assemble together might be great for younger students such as those in 5th through 8th grade.
We are looking forward to watching the updates as the students finish up the assembly and start delivering hands to their recipients and we are also excited to be getting more and more emails from teachers who want to start incorporating this into their own curriculums!
Our volunteers are currently working on putting together an official curriculum for K-12 and College Classes. Once we have something solid in place – we will share on our website for any teachers, anywhere – to use!
If you are interested in being assigned a child to create a hand for in your own classroom – please email us at info@enablingthefuture.org.